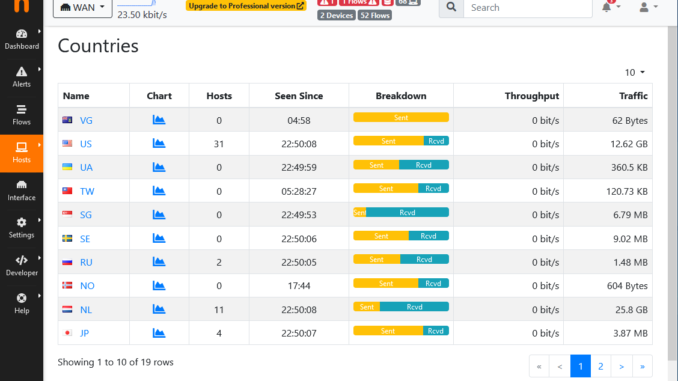
It was time to take control… ntopng on pfsense is an old version. And I really hate those packages where you have no control over updates, only to wait a long time before it is updated in a new version of pfsense.
The pfsense-ntopng module can connect to a remote Influx database, which I had running as part of another project to create a Grafana dashboard for pfsense. But I had some serious issues when either pfsense or the Grafana server went offline for backup or maintenance. It could not reconnect and I had to drop the Influx database, reset the pfsense-ntopng Timeseries Database configuration to reconnect again, loosing history ofcourse…
As of today, this problem is gone. I’ve got my ntopng server running, connected to my graylog-server with Grafana on top of it and it reconnects even after rebooting the firewall, ntopng-server and the graylog-server.
Take in mind that my setup with pfsense, ntopng and all the other servers, are running as virtual machines on a Windows Server with Hyper-V.
What Linux distro to choose…
So, I installed an Ubuntu 18.04 Server at first but it seems they are now using Netplan which until the day I wrote this, still doesn’t support network cards to be set in promiscuous mode. So, skip Ubuntu for this…
Let’s try Debian 10! Yes, oh.. No! It will work, no doubt, but I’m getting a bit tired of updating these OS-es which have a lifespan of only 2 years.
So what is the lifespan of CentOS 8? Ah! 10 years! Okay, it is a bit tougher OS than Ubuntu and Debian when it comes to out-of-the-box configuration and installing packages, but we might be able to handle that. At the moment of this writing, ntopng is at version 4.1, but… Only available for Fedora and OpenSuSe. CentOS 8 has version 4.0. Ah, well, it is more recent than 3.8 from pfsense!
CentOS 8, ntopng 4.0, and a lot of other stuff
So we started to install CentOS 8 on Hyper-V; you will find somewhere on Internet that you can create it as a Generation 2 virtual machine, just give it a fixed 2GB of RAM to get rid of dynamic memory balloon errors. (Yeah, you can fix it somehow, but using fixed memory makes it more stable)
After that, let’s do some basic stuff on CentOS. If you want to know my source: https://www.networkshinobi.com/ntopng-on-centos-8-lxc/
I asume you are either logged in as root or are using sudo for each statement, or use sudo -s
yum update -y
yum install -y epel-release

# wget is needed to retrieve the programs from internet
yum install -y wget

# If you don't like vi/vim
yum install -y nano
Now we have set the basics, we can prepare stuff for installing ntopng.
cd /etc/yum.repos.d/
wget http://packages.ntop.org/centos-stable/ntop.repo -O ntop.repo
rpm -ivh https://dl.fedoraproject.org/pub/epel/epel-release-latest-8.noarch.rpm
Now the repository is set, do some cleanup. You can find the info here: http://packages.ntop.org/centos-stable/
After that, start installing ntopng, which might take a little while.
yum erase zeromq3
yum clean all
yum install -y pfring-dkms n2disk nprobe ntopng cento
In my case I also installed the RING drivers, as the virtual interfaces are 10Gb internally. So, might as well make use of it…
yum install -y pfring-drivers-zc-dkms
Before we actually start ntopng and activate it as a service, we still need to configure some things.
First, the firewall needs to be configured to access the webbased GUI of ntopng.
firewall-cmd --permanent --add-port=3000/tcp
firewall-cmd --reload
In my setup I am using port mirroring from Hyper-V. So I added a second network interface from virtual switch LAN and virtual switch WAN.
So in CentOS 8 I created network interface configuration files in /etc/sysconfig/network-scripts/
[root@vm-ntopng]# cd /etc/sysconfig/network-scripts/
[root@vm-ntopng network-scripts]# ls
ifcfg-eth0 ifcfg-eth1 ifcfg-eth2
In my case ifcfg-eth1 is for LAN monitoring and ifcfg-eth2 for WAN monitoring.
Use nano to create and configure these network interface settings. For example ifcfg-eth1, and create one for ifcfg-eth2 as well. I disabled IPv4 and IPv6 so the cards will function as mirror-ports for ntopng.
TYPE="Ethernet"
PROXY_METHOD="none"
BROWSER_ONLY="no"
BOOTPROTO="none"
DEFROUTE="no"
IPV4INIT="no"
IPV4_FAILURE_FATAL="no"
IPV6INIT="no"
IPV6_AUTOCONF="no"
IPV6_DEFROUTE="no"
IPV6_FAILURE_FATAL="no"
IPV6_ADDR_GEN_MODE="stable-privacy"
NAME="eth1"
DEVICE="eth1"
PROMISC="yes"
Before we can run ntopng, we need to edit the config file located at: /etc/ntopng/ntopng.conf
Make sure you use your own IP subnet. I left all comments out to keep it short for here.
-G=/var/run/ntopng.pid
-i=eth1
-i=eth2
-w=3000
-m=192.168.101.0/24
-n=1
--community
Okay, we are ready to rumble! Lets startup ntopng and create it as a service.
systemctl start ntopng
systemctl enable ntopng
Now visit your ntopng webbased gui on http://<ip address>:3000
Use admin/admin for the first time logon and a password change is requested.
Yes! It is running! Now what?
Well, actually there are some things to be set in the webbased gui, so let us review these basic settings here.
First of all we need to set the WAN interface, so click Interfaces in the left menu and click the settings-wheel.
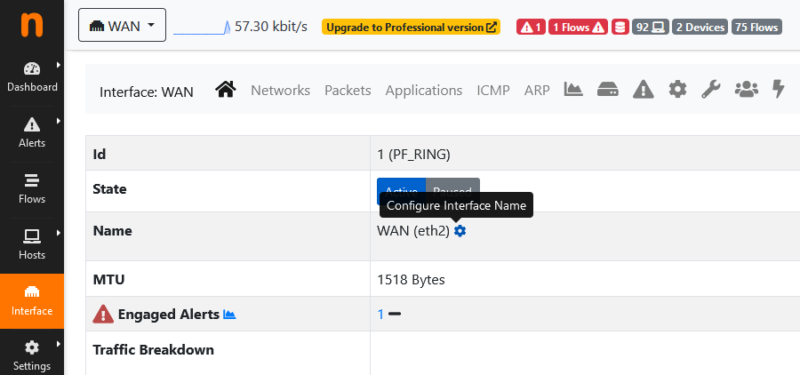
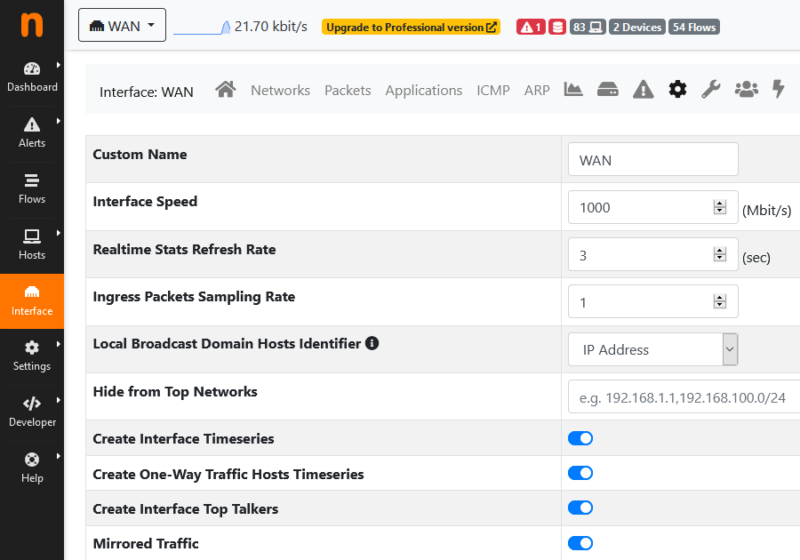
Once we’ve done that, we can adjust some settings for the WAN-interface.
Make sure that Mirrored Traffic is enabled and Local Broadcast Domain Host Identifier is set to IP Address.
Select the LAN-interface using the dropdown menu on top.
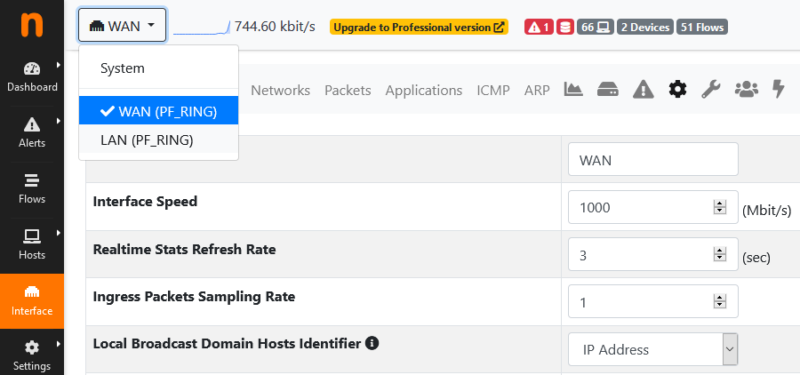
And set Mirrored Traffic to enabled and Local Broadcast Domain Host Identifier to MAC Address.
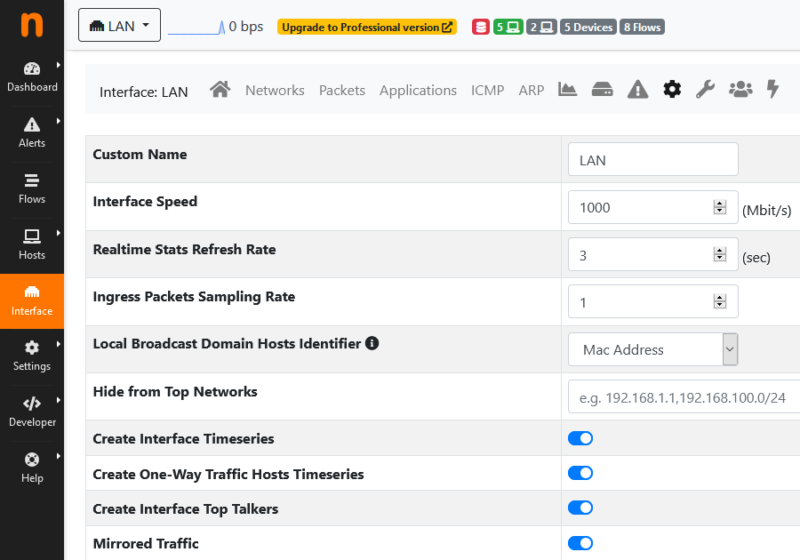
There are many things you can set, but for me this was basically all I needed.
But, there is one more thing to do, which you might have seen on your own webbased gui. It is mentioning something about Maxmind’s GeoIP.
Install MaxMind GeoIP2 Lite on CentOS 8
Basically I bumped into the same thing as usual, the default version for geoipupdate on CentOS 8 is version 2.5, which is so very old that you need to create an old type of unencrypted license key to enable automatic updates.
Nah… We’re not gonna do that…
It took a while when I found this page…
https://rpmfind.net/linux/rpm2html/search.php?query=geoipupdate
Originally, I am more a Windows person so I am not very experienced with Linux and their distributions. But what I did know is that CentOS is based upon RedHat. Now it seems Fedora is in the same family.
Okay?.. So could we install a Fedora RPM package of geoipupdate version 4 on CentOS 8?
Well, yes it could but not advisible due to possible dependencies.
Quoting the Fedora Project WIKI:
Extra Packages for Enterprise Linux (or EPEL) is a Fedora Special Interest Group that creates, maintains, and manages a high quality set of additional packages for Enterprise Linux, including, but not limited to, Red Hat Enterprise Linux (RHEL), CentOS and Scientific Linux (SL), Oracle Linux (OL).
EPEL packages are usually based on their Fedora counterparts and will never conflict with or replace packages in the base Enterprise Linux distributions
So we are going to install geoipupdate-3.1.1-2.el6.x86_64.rpm from the EPEL 6 for x86_64 distribution.
wget https://rpmfind.net/linux/epel/6/x86_64/Packages/g/geoipupdate-3.1.1-2.el6.x86_64.rpm
rpm -i geoipupdate-3.1.1-2.el6.x86_64.rpm
Once this is installed we need to change the config of geoipupdate a bit. You do need an account at Maxmind, so if you don’t have one, create one here.
nano /etc/GeoIP.conf
# GeoIP.conf file for <code>geoipupdate</code> program, for versions >= 3.1.1.
# Used to update GeoIP databases from https://www.maxmind.com.
# For more information, visit the docs at https://dev.maxmind.com/geoip/geoipupdate/.
# AccountID is from your MaxMind account.
AccountID 000000
# Replace LicenseKey with an active key associated with your MaxMind account.
LicenseKey 0000000000000000
# EditionIDs is from your MaxMind account.
EditionIDs GeoLite2-ASN GeoLite2-City GeoLite2-Country
Now the GeoIP2 databases are originally stored in /usr/share/GeoIP/
As we need a cronjob to automate the update, we will also copy these files to the location ntopng wants them to be residing.
First check if the directory /etc/cron.weekly exists. If not, create it. Next we will go to /etc/cron.d to create our cronjob to update the GeoIP2 databases and to copy them to the ntopng directory
[root@vm-ntopng]# cd /etc/cron.d
[root@vm-ntopng cron.d]# nano 0weekly
# Run the weekly jobs every sunday 01:00 AM
SHELL=/bin/bash
PATH=/sbin:/bin:/usr/sbin:/usr/bin
MAILTO=root
0 1 * * 0 root run-parts /etc/cron.weelky
Now we are going to make the script to perform the actions.
[root@vm-ntopng cron.d]# cd /etc/cron.weekly
[root@vm-ntopng cron.weekly]# nano GeoIPupdater.sh
#!/bin/sh

SHELL=/bin/bash
PATH=/sbin:/bin:/usr/sbin:/usr/bin
MAILTO=root

# Perform geoipupdate and copy databases to ntopng location

geoipupdate

cp -u /usr/share/GeoIP/GeoLite2*.mmdb /usr/share/ntopng/httpdocs/geoip/
In order to let this script work, we need to give it execute right. After that, let’s try it out by running the script so it downloads the newest versions of the GeoIP2 databases.
[root@vm-ntopng cron.weekly]# chmod +x /etc/cron.weekly/GeoIPupdater.sh
[root@vm-ntopng cron.weekly]# ./GeoIPupdater.sh
[root@vm-ntopng cron.weekly]# systemctl restart ntopng
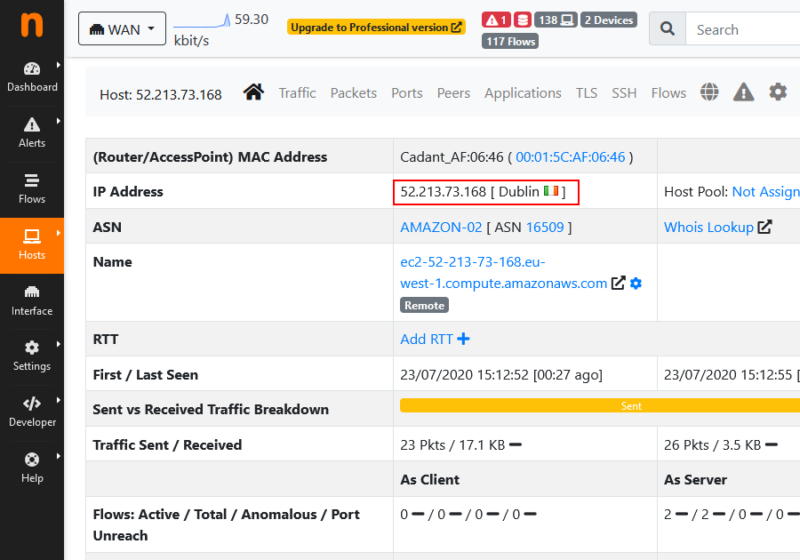
So, to check if it actually works, browse to the webpage, select your WAN interface, click left menu Hosts and select Hosts.
You will see country flags appear. Now click an external IP address and.. voilá! You have integrated GeoIP2 with a more recent updater than the standard version 2.5
Setting up a dashboard for pfsense with Grafana, is quite a story. The first project which I found was completely in Docker.
Nah,.. I’m not a Docker-guy. It’s too new for me and it lacks manageability in the way I am used to. And… It was based on older versions of the numerous app involved…
So, I rebuilt this project entirely on a new Ubuntu 18.04 server. Just installing everything there was to be installed, looking for the right versions which will coop with eachother.
Want to spoil your time too building a dashboard? Good luck!
Ingredients:
- Ubuntu 18.04
- Graylog-server 3.3.2
- Elasticsearch 6.8.10
- Cerebro 0.9.2
- MongoDB 4.2.8
- Kibana 6.8.10
- Grafana 7.1.0
- Influx 1.8.1
Well, I got it working sort of. The templates available for Grafana-pfsense are not really that good written, some are acurate. Some are totally not.
It was fun getting to know Grafana and Graylog and such, but I’ll stick to ntopng for now. It gives me no nonsense insight.

Leave a Reply